Thursday, August 29, 2013

A Little Koi

I was so pleased last week when I received an email from Amy Smart that I won her giveaway from Honey Be Good. I chose to receive the 13 fat quarter bundle of these delicious organic fabrics Koi for Coud9. I am so excited to make something great with them.


I do have a plan in mind: this adorable pieced hexagon quilt from Rashida Coleman-Hale who also designed the fabrics. So once these goodies came in the mail I ripped them open and took some pictures as part as the Quilt Photography Workshop link up over at Plum and June

Plum and June


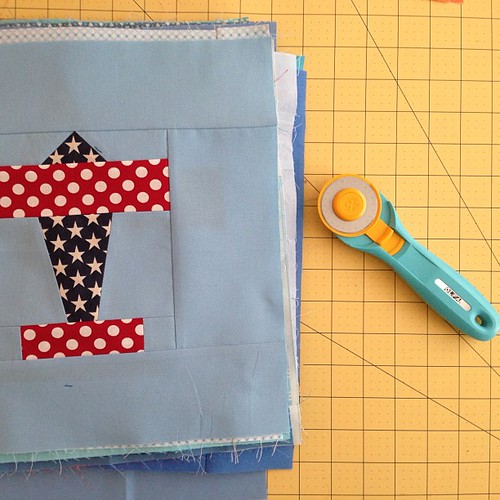
I take all of my pictures on my iPhone. I know they aren't the best quality, but my only other camera is a 5-year old point and shoot and I just don't have time to take it out then upload them. And to tell the truth, my phone is just as good. Hopefully next year I can get a nice camera and take a class how to use it! I am completely lost on all things like that, but I would love to learn.


So I will stick with my iPhone photos for now and just enjoy the simple click and shoot and easy editing right on my phone. And I upload them from my phone too. 

Don't you just love this line? I love these blenders above. I can see the fish-inspired scales, but it doesn't look fishy. I was expecting the main fabric with the koi on it to be a little more navy, but it is a beautiful deep royal purple. So I won't be making a boy quilt with this stack, too many pinks and purples. 


I most of my pictures right in front of my back sliding glass door. I love the wood texture as background and all the natural light that comes in during the afternoon. 


But I must say my favorite print is this charcoal plus print. I want to buy the voile yardage and make a fun dress.

Sunday, August 25, 2013

A Finished Airplane Quilt: For Charity

May was my month to quilt for the group Inspire at do. Good stitches. I chose to make red, white, and blue airplanes. It is so easy to make baby girl quilts, so I am trying to do boy quilts and mainly older ones. So I received all these wonderful airplanes from some lovely ladies all over the country.

Almost done!

I actually had 2 too many! But I decided to leave them out because it was easier to make the 4x5 configuration for a nice sized toddler quilt and fit better with the minky backing.

20 airplane blocks pressed and ready to be trimmed (with my new Olfa splash!) I will finish my #Alyof goal this month!

I did free-motion loops and clouds quilting on the top with the batting. My machine has been having tension issues and I was afraid to free-motion on minky. So this was the best choice. I think it turned out great. I love all the texture on the front. Here is a close up of the quilting: Loops and Clouds! I just went for it and I'm very happy with how it turned out.


I love the solid red minky on the back and the nice textures on the top. And no binding! I always procrastinate on binding, so I decided to skip that part too. It seems like I did a lot of short cuts, but this had just as many steps as a normal quilt.

Finished Inspire at do. Good stitches airplane quilt

Here is my finished quilt with my lovely husband taking a break to hold it up for me. He's so sweet with giving me extra time to sew and staying up with me late while I try to finish. It has been raining every day here, so trying to get a picture has been difficult. So dreary and no sun!

Finished Inspire at do. Good stitches airplane quilt

And trying for inside wasn't any better. These little monkeys wanted right on it. I guess it's a hit! I hope so because this quilt is my Lovely Year of Finishes August goal (goal setting here). I am also entering it for the 100 Quilts for Kids at Swim Bike Quilt.
Updated: I handed off this quilt to my local Linus Project coordinator and she is finding an appropriate recipient .
Quilt Stats:
12" Blocks pieced from the wonderful ladies at Inspire at do. Good Stitches and tutorial from Badskirt
Pieced and quilted by me on my Bermimi with light blue thread (a Bernina 330)
Finishes about 45"x55"

Sunday, August 18, 2013

My Workspace!

Welcome today for the Studio Spotlight! Linking up from over at Ellison Lane. I work in my dining room and store my supplies in my son's closet (what? He's not using it! Haha). This week I took it upon myself to make it more presentable. And more workable. This is what I was working with before:


It really just got out of hand from not sitting down and organizing it after I would come home with new fabric and not putting things away correctly. So I locked the kids out of the room (and left them with the husband, not alone!), and pulled almost everything out. I refolded all my fabric and sorted better.

Home Dec and some fabrics for a few dresses I have planned.
I really need more cool colors! I love my pinks ;)
Lots of greys, some neutrals and blacks, LV, multi-colored to the right 

I guess I don't need to buy any more batting for awhile...

A few quilts in the works, Chicopee and A Merry Little Christmas high on the list

Solids and scraps.

I sew on my dining room table. I love all the natural light (although it makes it hard to picture) and that it is open to the kitchen to the left and the living room (which I am standing in to take the picture). But it is too open if you know what I mean.


Here is my little guy "helping" mommy. And touching everything. I wish I could close a door and lock them out sometimes, but then I would miss them and they would whine at the door anyways!


It is usually a mess and I have a lot of cleaning whenever anyone comes over, but I'm glad to have a space to create and enjoy my family. I am just hoping that our next house is a little easier to close off. I hope you enjoyed stopping by and come back again! I have a few mini tutorials coming up including my favorite way to do minky blankets and sewing bulky corners with paper piecing. Thanks!

Saturday, August 10, 2013

Home is...

I have started an exciting new project that I am just dying to tell you about. I saw this on Pinterest and of course you had to pay $40 for just the tracing paper with the pattern, so I decided to figure out how to do it on my own. I researched different ideas on how to transfer patterns onto fabric. I finally decided to put up the pattern up on a window and trace onto the fabric with a frixion pen. I know there has been some debate on how good the pen erases, but I've never had problems and it was the best transfer pen I had on hand.
Here is my set up on my back door. It wasn't quite wide enough, but I made it work.
Hand Quilted Love
I found this printable to use. You can print large engineering prints at Office Depot and Staples for under $5, but since I wanted to get started right away, I printed it off on my computer using the poster option. I just taped it together and put my 1 yard of white Kona right on top and got to work. I did all the tracing in the afternoon light where it isn't direct so that it wouldn't heat up too much. Then after I was done tracing, I thread basted it together with some batting and a solid blue back (Ocean Kona I believe).
I first worked on running stitches along all the state-to-state borders (the dashed lines). They went by pretty quickly. My advice is to do the longest connected lines first such as the Mississippi River that is the longest connected line.

Now I was ready to venture onto some embroidery. I found Mary Corbet's Needle n' Thread's Lettering Tips and Tricks and sat and watched all of her videos. I learned so much! They are easy to follow and she has a ton of helpful tips. I first wanted to try out some of the stitches I would use on a smaller project, so I stitched up with little initial with satin stitch. The leaves are herringbone, stem is stem stitch, and there are a few little french knots thrown in. I'm glad I practiced the satin stitch first. It's a little shaky on this project, but I got better the more I did.

First try at embroidery


This is what I have finished so far. I am excited to continue, but I really need to put it down to work on some deadline projects (i.e. the triple zip pouch swap, a kindermat cover for a friend, August's bee blocks).

I've been using a large quilting hoop to help me embroider the words.

So wrinkly! But I don't want to loose all my tracing lines...
Here is my finished triple-zip pouch for my partner! I hope she likes it!
When I started this adventure I did not have any pearl 8 cotton, so of course I had to buy some. And I needed a place to store it. So I used my newly purchased Juliana Racquel fabric from Joann's and this tutorial to make a cute bowl. I didn't have double sided stabilizer, so the one side it is a little bunched, but still adorable.


Started my pearl 8 cotton collection and needed somewhere to put them, so I had to whip up this cute bowl with my new fabric purchase.

Linking up at Creative Monday and Made by You Mondays 

Sunday, August 4, 2013

ALYoF August Goal

My one and only goal this month is to finish my quilt for Inspire at do. good Stitches. I got the last blocks in not too long ago and I'm trying out some different layouts. This is the first idea I had. I have put up a design wall after this picture, but right now I have a WIP taking up most of the room that I need to finish up first. 
Inspire progress
I was thinking about raw edge appliqueing clouds all over once it's pieced together. I might incorporate it into my quilting.

Speaking of quilting...the last times I've tried free-motion I have had crazy tension issues. And every time I use the zig-zag stitch my thread starts bunching funny and breaks. I guess I'll have to take my machine in to get serviced soon. At least I have the 1 year check-up for free. So while that is in the shop, I'll shall keep busy with these:

Octagon Progress

And this:


It is a hand quilted map with "Home is whee the Air Force sends us" at the top and a little embroidery for each station. I've done this center portion this evening off and on while I can and I'm pretty happy with the results. The finished quilt will be a wall hanging that finishes about 36"x40" that I will be proud to hang up at every new house. 

Linking up with Fiber of All Sorts